Enable Arabic Support for Windows
If you can read/write in Arabic using MS Word or Notepad, that does not mean that applications with Arabic interface will work and display correctly.
For Windows XP, you have to install the fonts first (if you still can't read/write in Arabic), but in Windows 7 they are already installed.
Windows XP
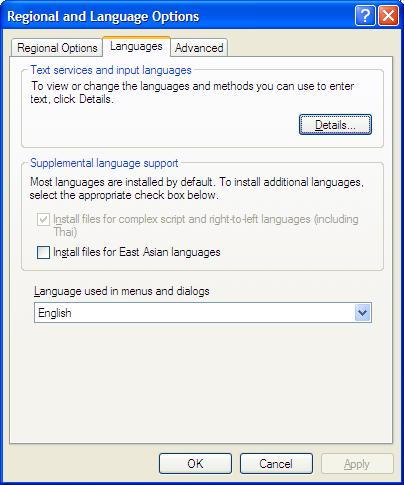
1 - Click Start, click Control Panel, click Regional and Language Options.
2 - Click Language tab, then select the Install files for complex script and right-to-left languages check box.
3 - Click Apply, but don't restart the computer at this stage.
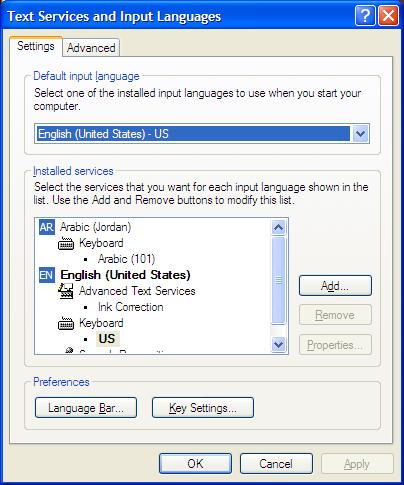
4 - Go to Advanced tab and choose from the list Arabic (Your Country).
5 - Hit OK, and restart your computer.

Step 4 is what will make your applications display the Arabic interface correctly, and it will install the Arabic language under Language tab - Details.
Windows 7
For Windows 7, we will only need to do step 4, but procedure has been changed little bit.
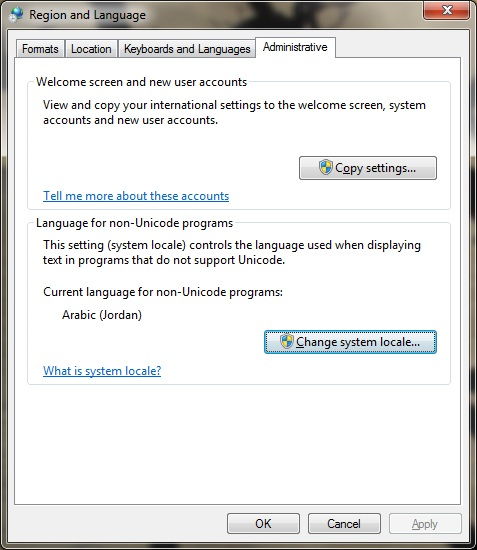
1 - Click Start, then type Region and Language and hit enter.
2 - Click Administrative, Click Change system local, and choose Arabic (Country).
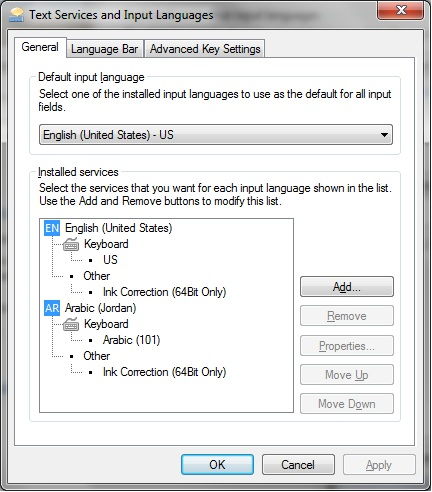
3 - Go to Keyboards and Languages, click Change Keyboards and make sure that Arabic is in the list.