Change TCP/IP Settings
Usually, all computers are configured to receive TCP/IP settings automatically from DHCP server (Dynamic Host Configuration Protocol). But, sometimes we need to configure a static IP address; if we are setting up a server. Or change the DNS server or the gateway; if we have special needs.
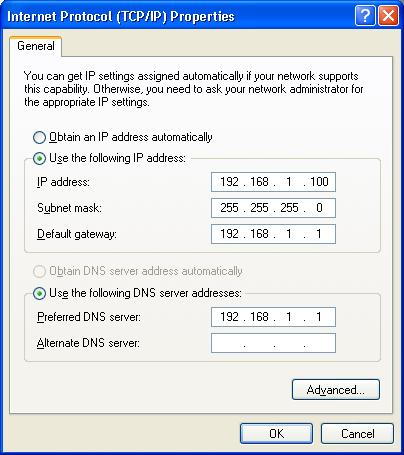
Windows 2000, 2003, XP
1- Click Start, click Control Panel, and click Network Connections.
2- Right click on Local Area Connection, and click Properties.
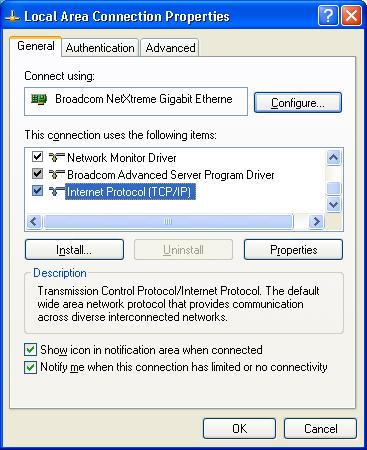
3- Scroll down the list and highlight Internet Protocol (TCP/IP), then click Properties.
4- From the new windows, click on "Use the following IP address", then enter the required IP address details (IP address, Subnet mask, Default gateway, DNS) as in the example below:
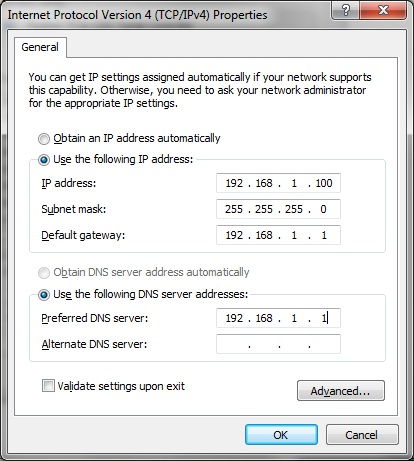
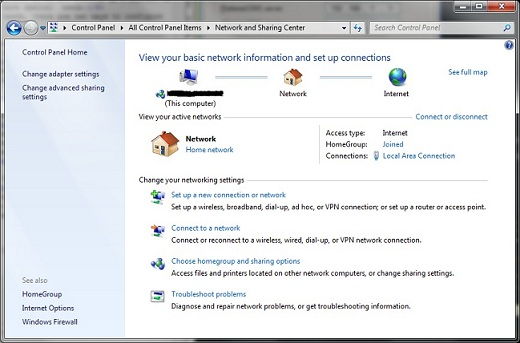
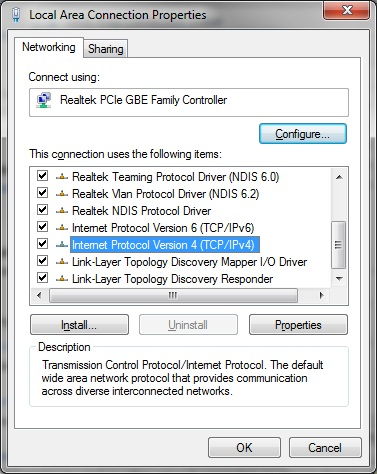
Windows Vista, 7, 2008
1- Click Start, click Control Panel, and click View network status and tasks under Network and Internet. If the control panel view is not in category mode then click on Network and Sharing Center.
2-Click on Local Area Connection and then Properties; if available in the Network and Sharing Center, otherwise click on Change adapter settings, then right click on Local Area Connection and click properties.
3- Scroll down the list and highlight Internet Protocol Version (TCP/IPv4), then click Properties
4- From the new windows, click on "Use the following IP address", then enter the required IP address details (IP address, Subnet mask, Default gateway, DNS) as in the example below: